Creating a glow button-
October 18, 2009
This must be a very basic requirement for having some fancy button designs for your website.. therefore let us just jump in to this tutorial and kick start with our goal of achieving the button glow..
After opening in your Photoshop press “ctrl + N”… go with the default settings for the new file and name it as per your need, here I have named it as button_glow..

Then use the rounded rectangular shape tool and create a shape as is shown below..

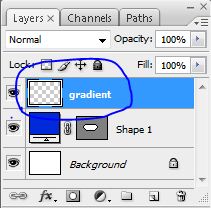
Now as the shape created, just add a new layer named “gradient”,
you can add a new layer from the layer menu option..

Then with the gradient layer selected, use the gradient tool and with the “foreground to transparent” gradient type… where the foreground color has to be set to white and apply the gradient over the shape..
Then just press Ctrl and select the shape layer by clicking on it with the left mouse button which will select the shape wholly..
Now the next step is to select the eclipse marquee tool and make a selection as below, this selection can be made by holding the Alt key and making an ellipse as per your need..

Then you must get a selected portion as the one above. The next step is to right click on the shape and you get a menu pallet from where you have to select the “feather” option.

Then a small window appears, where you have to set the radius value at around 15. Finally select the gradient tool again with the same type of gradient as used previously and apply it straight away..
So we finally arrive at our requirement of a glowing button as is shown below..

Then as per your need just add the text to form the real menu buttons..
as the one I have done below…

Filed in Adobe Photoshop
Tags: Adobe Photoshop, button, glow effect, photoshop